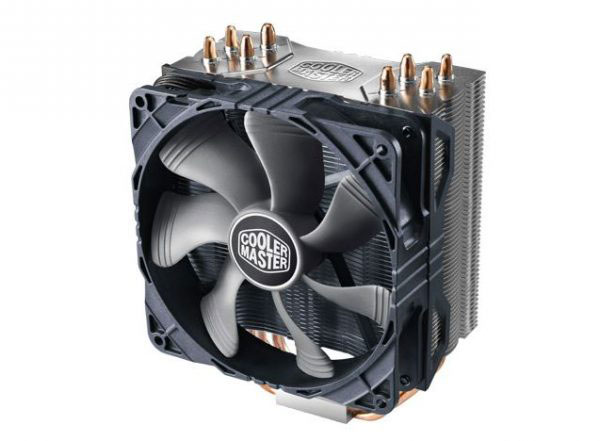
Cooler Master Hyper 212X – Air Cooler Review, Benchmarks, and Benefits
Published in 2015, Updated in 2022
In this article, we will step by step install the Cooler Master Hyper 212X Air Cooler and also share the benchmarks and comparison with the stock Intel cooler.
The Cooler Master Hyper 212X is an excellent air cooler for your Intel or AMD Ryzen processor. If you have a gaming PC at one point, you may look at pushing it a little more from the stock speeds to get the extra performance.
If you have Intel K series processor or AMD Ryzen processor, it is worth doing a mild overclock to get some free performance boost.
These aftermarket processors come with bigger and better fans and heat sinks to offer very silent operation. The stock Intel cooler, after prolonged use, can become noisy due to age/dust and wear and tear.
Do You Need A Processor Cooler For a Gaming PC?
We were looking to overclock the Intel Core i5 3570k to a moderate 4.2-4.3 Ghz and wanted a low noise, well-built cooler. Though DeepCool Gammaxx 300, which I have used before, is an excellent product in terms of noise levels, with Cooler Master Hyper 212X, you get an additional 4-8 degree Celsius advantage.
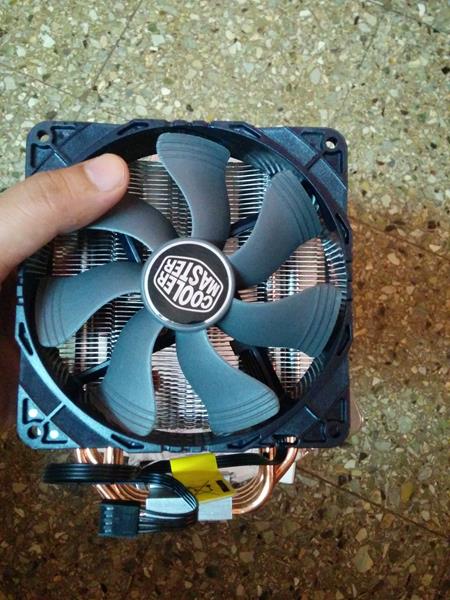
Most other processor coolers like the Cooler Master Hyper 212 Evo come with a single fan, but the 212X has a dual-fan mechanism for cool air intake and exhaust for hot air.
Advantages of Using Air Cooler Vs. Liquid Cooler
- No spills or leakage issues.
- Easy to install.
- Reliable and can be used for many years.
- Affordable price.
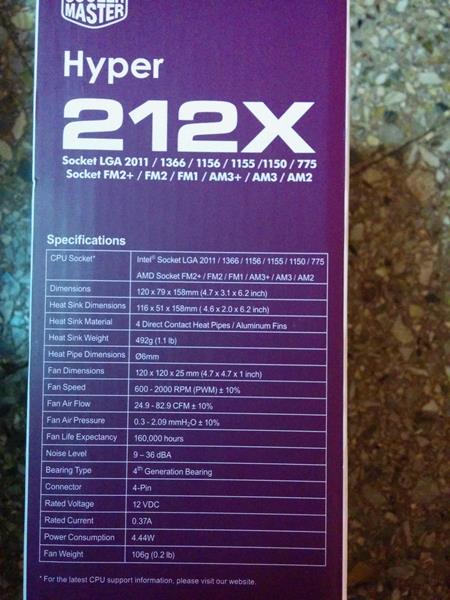
Specifications Cooler Master Hyper 212X
- Compatible Processors – Intel LGA 1366/1156/1155/1150/775/LGA 1200, AMD FM2+/FM2/FM1/AM3+/AM3/AM2+/AM2/AM4
- Dimensions – 120 x 79 x 158 mm
- Fan Dimensions – 120 x 120 x 25 mm
- Fan Noise Levels – 9 – 36 dBA
- Heat Sink Material – 4 Direct contact heat pipes / Aluminum fins
- Fan Speed – 600 – 2,000 RPM
- FAN Airflow Speed – upto 83 CFM
Unboxing And Installation Cooler Master Hyper 212X
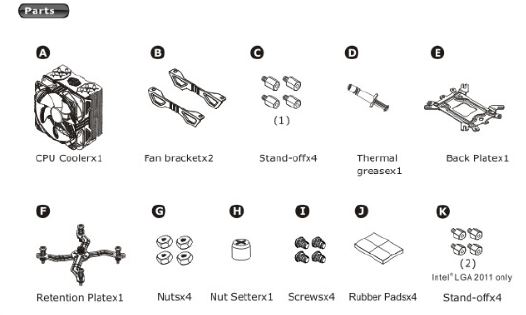
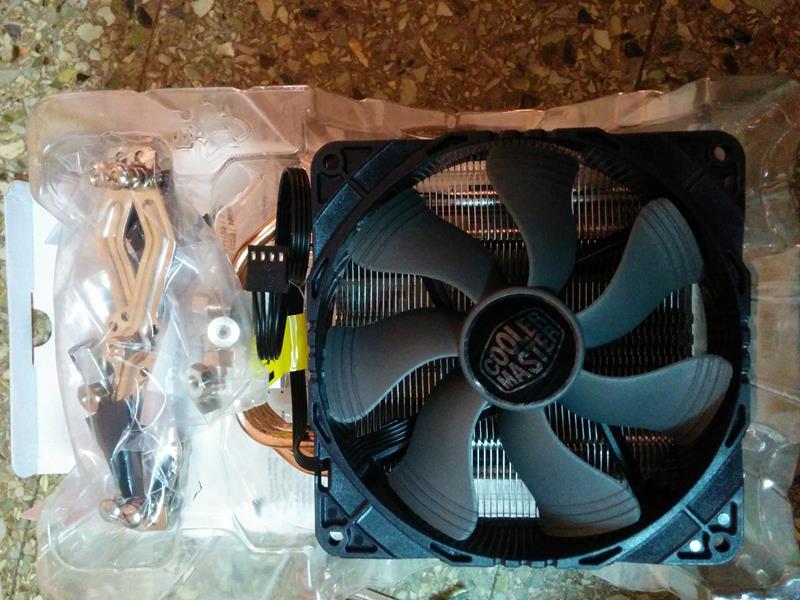
The Cooler Master Hyper 212X comes very nicely packaged with all the accessories/parts required to fix the cooler on your processor.
Parts you get with the Hyper 212X.
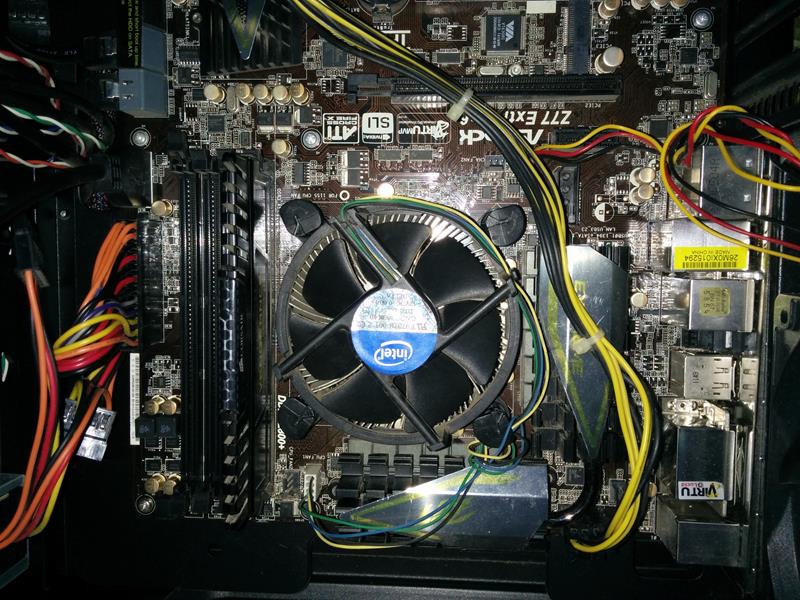
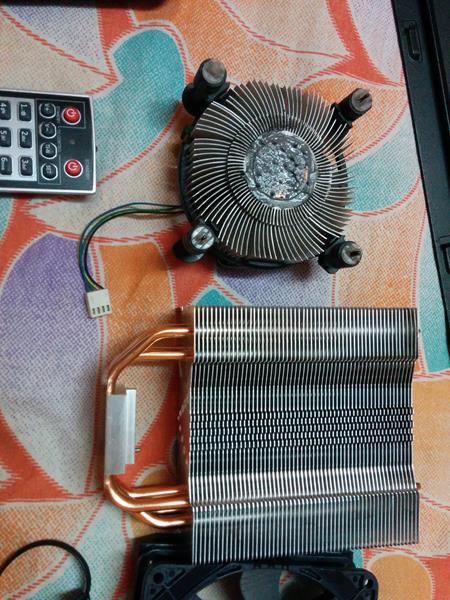
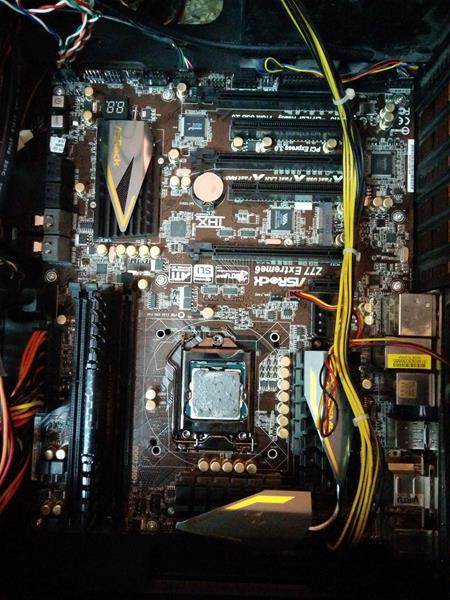
Intel Stock Cooler on Asrock Extreme 6 Motherboard
UnBoxing Pics For Cooler Master Hyper 212X
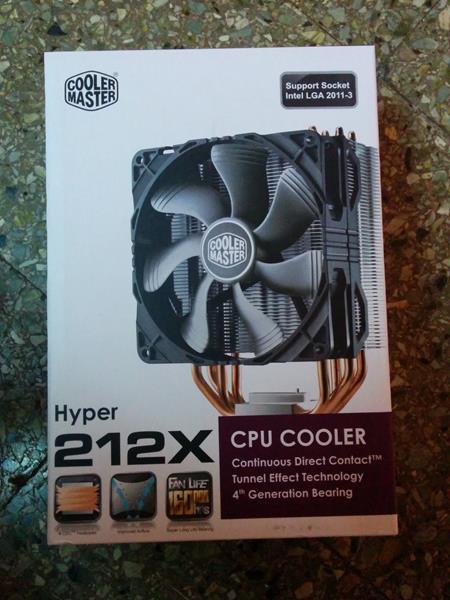
Packaging Cooler Master Hyper 212X
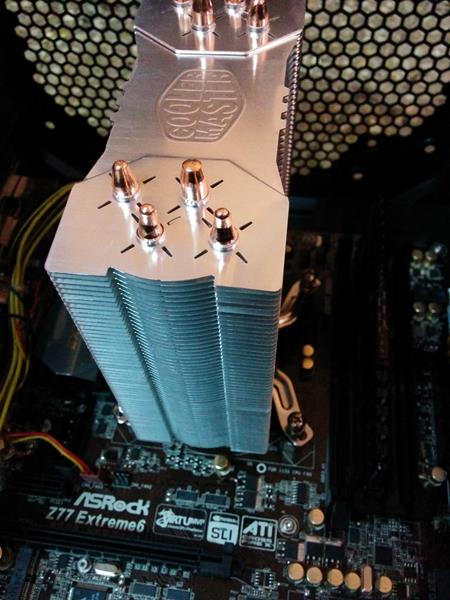
The Size of the Cooler is enormous, and the Built Quality is Superb
Parts Which You get Along with The Cooler Master Hyper 212X
Size of Fins on the Cooler Master Hyper 212X is Enormous Compared to the Intel Stock Cooler
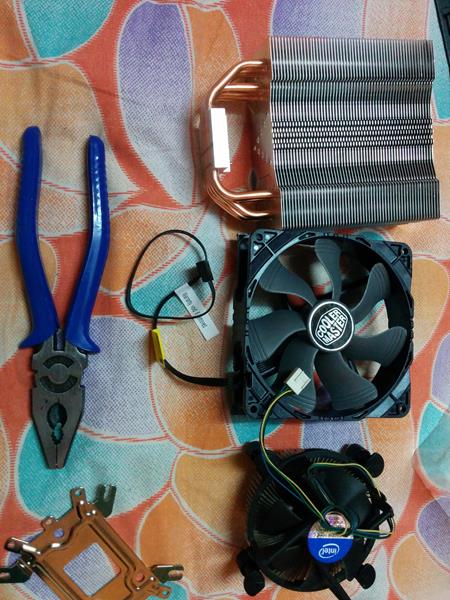
Intel Stock Cooler and Hyper 212 X side by Side
Review and Install – How to Install an Air Cooler in Gaming PC
If you can remove the motherboard from your cabinet, the whole process will be easy if you do it for the first time.
Step 1 – Removing Stock Intel Cooler
First, remove the Intel Stock Cooler from Your Motherboard by rotating the four plastic screws.
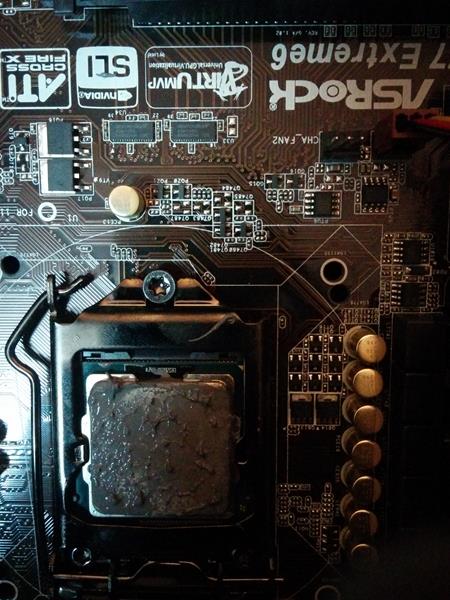
Remove it carefully as the TMS (thermal paste) is on the CPU cooler and the contact surface.
Step 2 – Clean the Processor – Remove dried Thermal Paste
Clean the Processor – You can use a plain white clean cotton cloth to remove the processor’s TMC (thermal Compound). The thermal paste dries after some months, and it is best to remove the old paste and apply it fresh when installing a new cooler.
Do it slowly and with light strokes so you don’t spill the dried TMS on other parts and inside the processor.
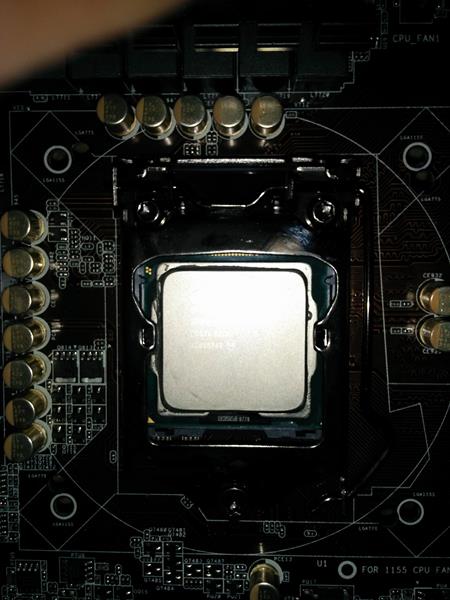
After Cleaning the TMS, the processor looks shiny and clean; now, let’s begin installing the Hyper 212X.
Step 3 – Mounting the Backplate for the Fixing the Air Cooler
Mount the backplate first for securely tightening the cooler at the later stage.
Turn the motherboard and secure the backplate with the help of the four nuts given (Check the Manual to see the instructions as well).
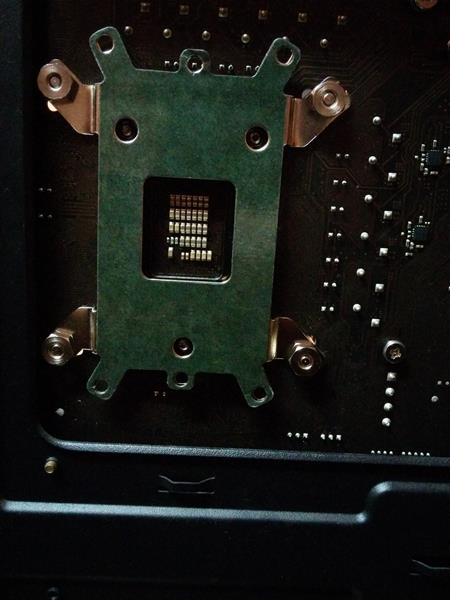
As shared above, it is how your backplate will look once it is fastened to the back of your motherboard with the four screws.
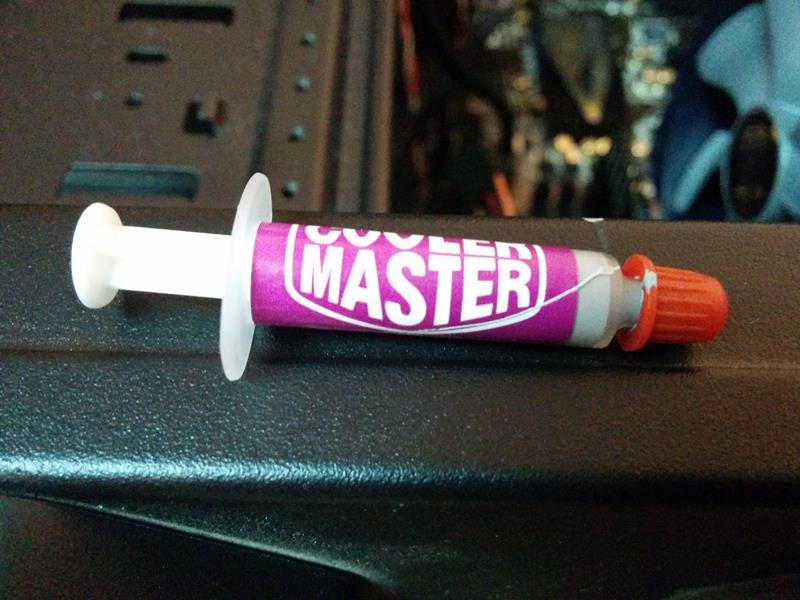
Step 4 – Apply The Thermal Paste to the Processor
Fix the stand-offs (screws) on the motherboard front side on which you have to mount the processor cooler before applying the TMC.
Apply The TMC to the Processor – There are many suitable methods to Apply TMC. I prefer the spread method, and you can choose the big center blob or X-method.
Here is a video to see how TMC spreads – Don’t Use any other TMC with this cooler better use the TMC supplied by Cooler Master.
How To Apply TMC To Your Processor
Source: Video – Courtesy Asus North America
He uses the big blob Centre method. You can also spread the TMC uniformly using a clean Razorblade on the processor with a thin layer covering the entire processor. Just make sure you don’t apply too much thermal paste to the processor.
STEP 5 – Correctly Align the Retention Plate
After applying TMC, check the retention plate and screw position depending on which processor you have.
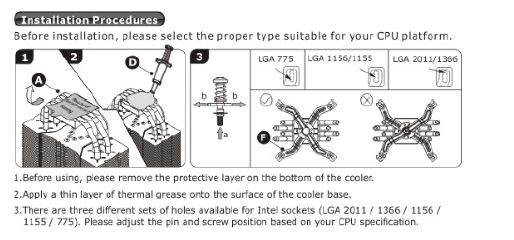
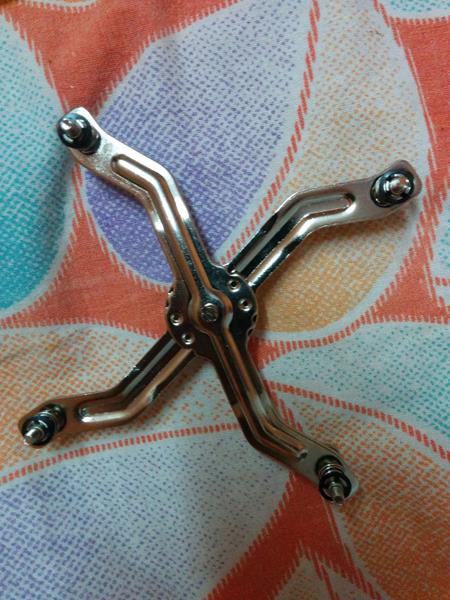
This is how your retention plate will look and be aligned for LGA 1155 processor.
Step 6 – Remove the Fan and Ram
Remove the Fan from the Thermal Fins, and it will help you fit the cooler easily.
Also, removing the RAM on the motherboard located at slot one can make installation tricky.
STEP 7 – Fix the Processor Air Cooler Using the Retention Plate Screws
Remove the transparent sticker from the processor cooler( at the bottom), apply very little TMC on the plate, and fix the processor cooler so that the screws on the retention plate go directly into the Stand-Off Screws. – This is the most tricky part of the installation – Be Patient and try to do it right.

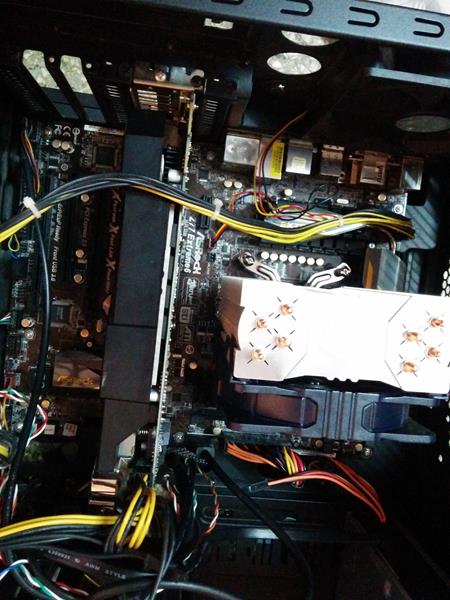
A small pin on the retention stand will fix and lock the retention stand when you have mounted it correctly. Don’t apply too much force. Try orientation and slight realignment. It will fix.
If it does not fix in one shot, take a break and get back to it after some time but make sure you don’t allow the bottom surface of the cooler where TMC is, so no contamination is done.
It may take some time to fix it, especially for the first time.
Please thoroughly read my procedure and the Manual which comes with the Cooler Master Hyper 212X.
Here is another good video you can watch before trying to do it yourself.
Source: Special Thanks to Chankey for the Video.
Best Processor Cooler For Gaming PC India – Hyper 212X Benchmarks
Here Are The Key Benefits Of Using The Cooler Master Hyper 212X
- It is very silent; even at load, the Fan is much quieter than the Intel stock cooler.
- There is a considerable decline in load temperature(while playing games like Crysis 3, Assassin’s Creed, Battlefield, etc.) and lower Idle temperature Vs. a stock cooler.
- Higher headroom for Overclocking – We easily clocked our Processor Core i5 3570k to 4.2 Ghz from a stock speed of 3.4 Ghz, which could be pushed much more as the thermal headroom is there.
- Though we got really good gaming performance with 4.2 Ghz clock speed and near-silent operation, so felt no need at this stage to push it any further for daily tasks.
You can use the Cooler Master Fans (silent) for the cabinet to create the right Airflow to reduce temperature – Cooler Master SickleFlow.